Using CGAL and Xcode
Mar 16, 2016
Note: the instructions below assume that you’re linking the CGAL libraries, which used to be the only possible way to use CGAL. From CGAL 5, you can use the simpler header-only mode.
For my research, I regularly need to write code to make various geometric computations on GIS datasets. Most of the time, I first use a simple library to read GIS formats (e.g. GDAL), and then I put everything into structures from CGAL, the Computational Geometry Algorithms Library. That allows me to do the more complex stuff.
Overall, CGAL is great. It has a rather steep learning curve and it’s only available in C++1, but it’s free for open source software2, fast and numerically robust. I consider it the single most important tool I use for my job. If I had no choice, I could find some kind (bad) substitute for everything else I use daily, but there’s nothing quite like CGAL.
As a Mac user, my IDE of choice is Xcode. It’s certainly possible to use CGAL by editing your code in vi or emacs and building from the command line using cmake and make, as plenty of others do, but I personally find it quite painful for complex code, especially when debugging. On the other hand, Xcode and CGAL work together like a charm. That is, if you don’t use the Xcode projects generated by CMake and instead create your own.
Creating your own Xcode projects for CGAL is easy, but I never found a post that properly explains how to get CGAL working correctly on your Mac and in Xcode, so I figured it all by trial and error. This is my attempt to make life a little easier for other Mac CGAL users.
Getting all the requirements right
CGAL is a big piece of machinery with a lot of dependencies. The exact ones depend on your CGAL configuration and the packages you use, but you can expect at least the following three:
- boost, which is a gigantic heap of C++ libraries and pretty much defined what C++11 and C++14 look like today.
- GMP, which provides arbitrary-precision arithmetic for those nasty geometric computations. You probably want to install it with its C++ extension, GMPXX.
- MPFR, which extends GMP by ensuring correct rounding.
There are many other things that might be nice to have, such as Qt and OpenGL for all the graphical demos, MPFI for interval arithmetic, and many others.
Luckily, most of these are trivial to install on Mac using Homebrew. If you have Homebrew (and you really should), installing a basic version of CGAL and its dependencies using Homebrew is as simple as:
$ brew install cgalSome additional dependencies might work by passing additional parameters to brew install cgal, such as --with-imaging to install CGAL’s Qt support (as well as Qt, if you don’t have it). However, I’ve had very mixed luck with that. Especially, the current situation with Qt5 is not good.
If you need support for any other dependencies (e.g. QGLViewer), need to use a bleeding edge version of CGAL or have any other special requirements, I think it’s better to download the CGAL source and built it from scratch. Assuming you’ve met all the dependencies (e.g. by installing each with brew install), it’s a piece of cake. Just go to your downloaded/cloned CGAL folder and:
	$ cmake .
	$ make
	$ sudo make install
If things don’t work right away, it’s probably better to use cmake-gui . instead. You can get it by installing CMake from the official installer (rather than homebrew). After that, you can pretty much delete all the rest of the cmake stuff and replace it with the homebrew versions.
To cmake or not to cmake?
CGAL comes with various scripts (in the CGAL/bin folder) that help you use CMake in order to create platform and compiler independent configuration files for your own code. If fact, If you’ve ever compiled CGAL yourself, you most likely already used CMake in a similar manner.
When asked to generate a Makefile for Make, CMake works great. It’s what I do to compile CGAL itself and also what I use in order to distribute my own code and make sure it works everywhere. Except on Windows, that is. Someday I might spend some time to fix that, but CGAL on Windows doesn’t work that well and I’m not very motivated to do it.
CMake can also many other kinds of configuration files, including Xcode projects and Visual Studio projects. However, the Xcode projects it generates frankly suck, at least as far as CGAL is concerned. The last time I tried them, they used the external build option in Xcode, which basically means downgrading Xcode to a glorified text editor3 that calls make and returns you the results. You basically lose all of its nifty features. They also attempt to link to all sorts of unnecessary stuff.
Making your own Xcode projects
So, if you’re anything like me, you’ll quickly disregard CGAL’s cmake scripts altogether and just start from a clean Xcode project. The instructions here are for Xcode 7, but they are pretty much the same in all recent versions.
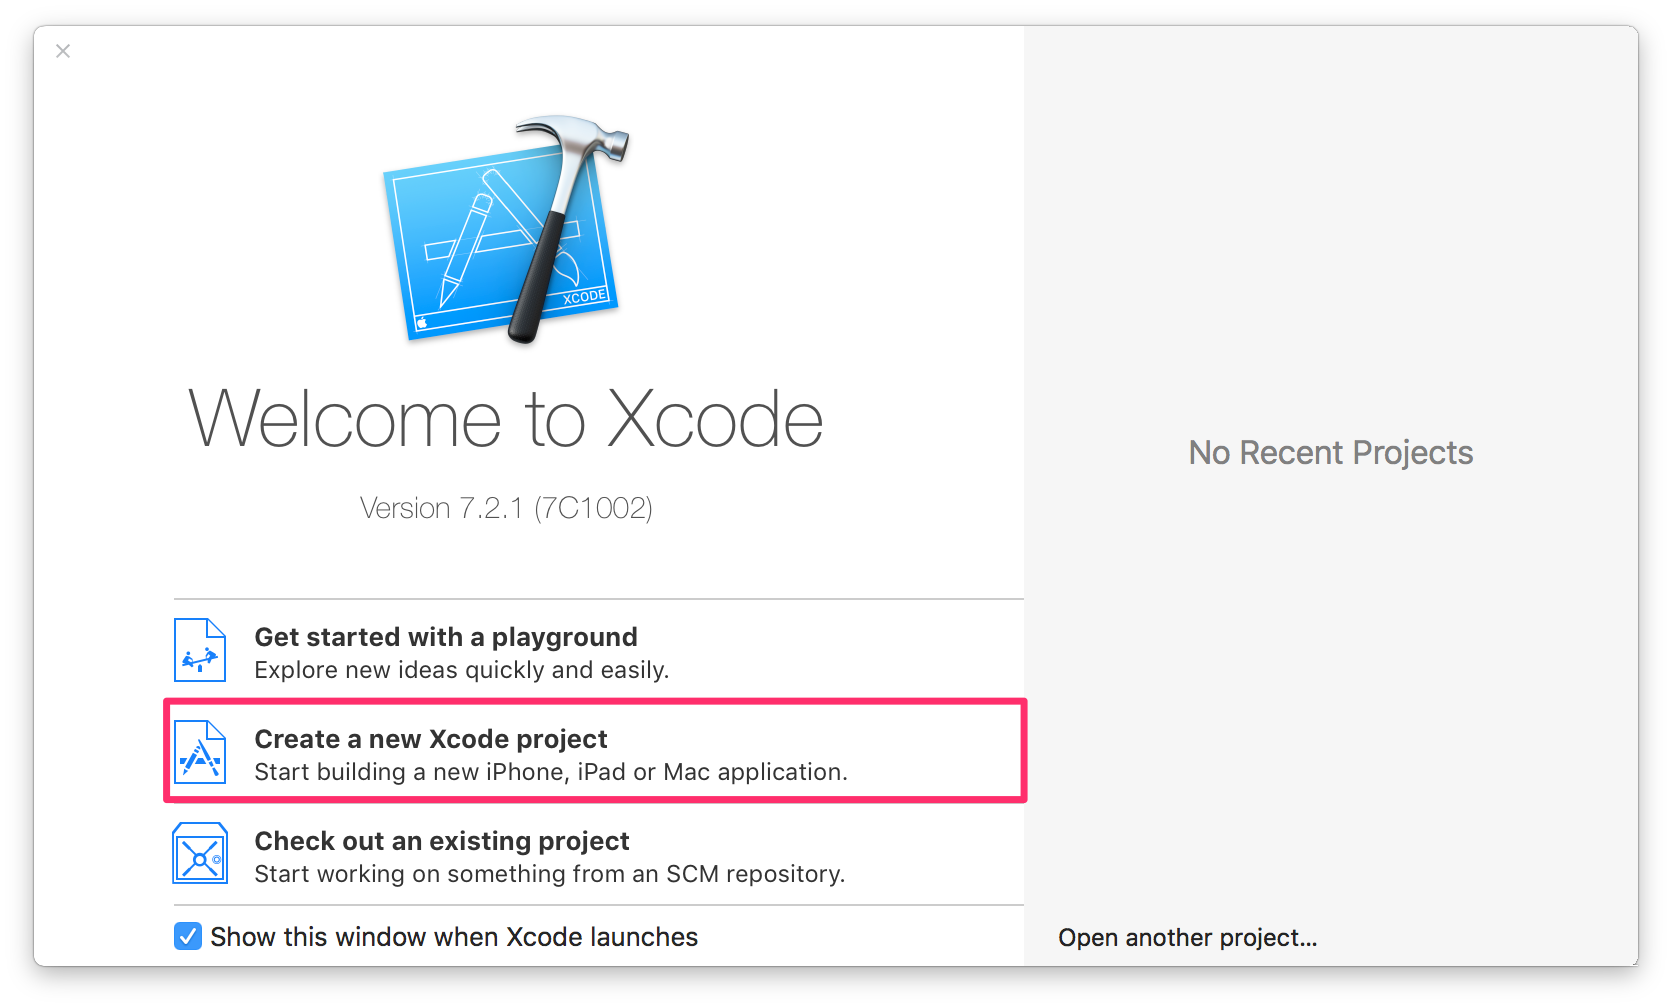
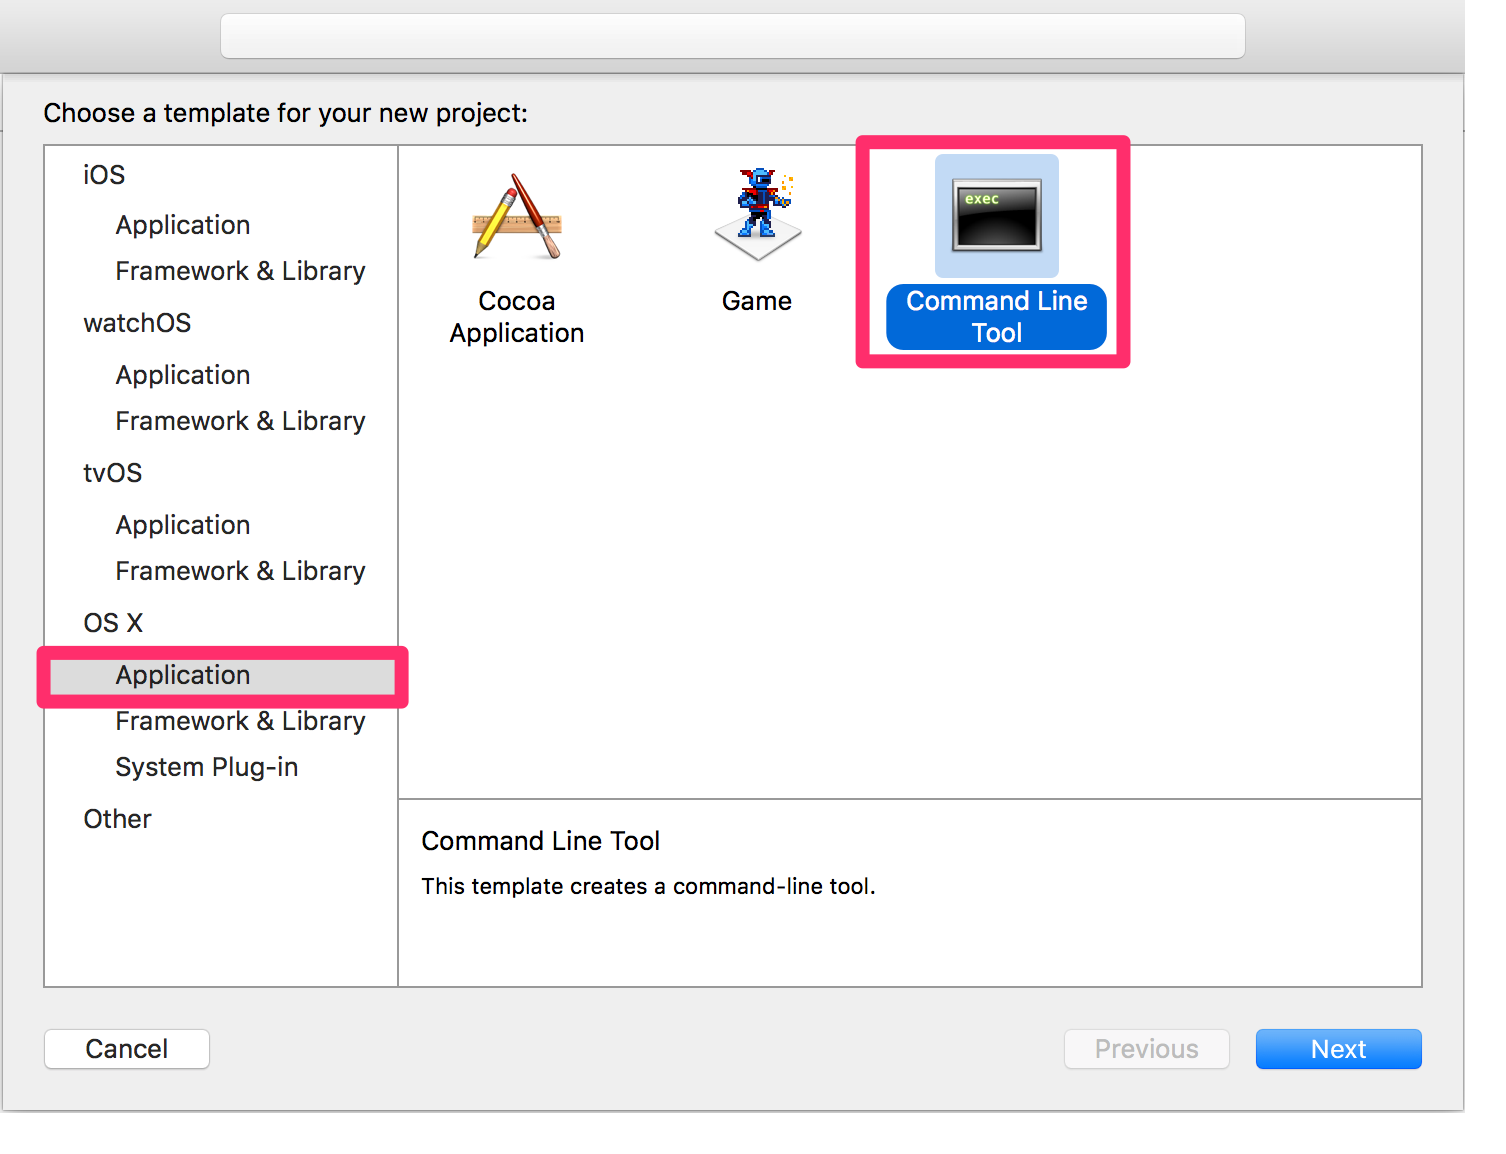
First, start by creating a new project (File > New > Project, or from the welcome window). Depending on what you plan to do, it can be any kind of project, but for simple things I prefer a Command Line Tool, which is found under OS X > Application. If you want something with a native Mac GUI, you probably should go for a Cocoa Application.
Once you’ve given your project a name, make sure that the language is set to C++ and click Next. Then decide where to save it, select if you want to create a local Git4 repository for it and you’re done. You’re then confronted with the main Xcode window.
Getting the build settings right
In short, Xcode works on the basis of projects and targets. I won’t go into it in detail, but while the project contains all your stuff, a target has the aim to create a given executable (or library, plug-in, etc.) based on some of the files in the project. A project can have many targets. Some of the settings at the project level cascade down to its targets, but I would recommend you to modify things directly at the target level.
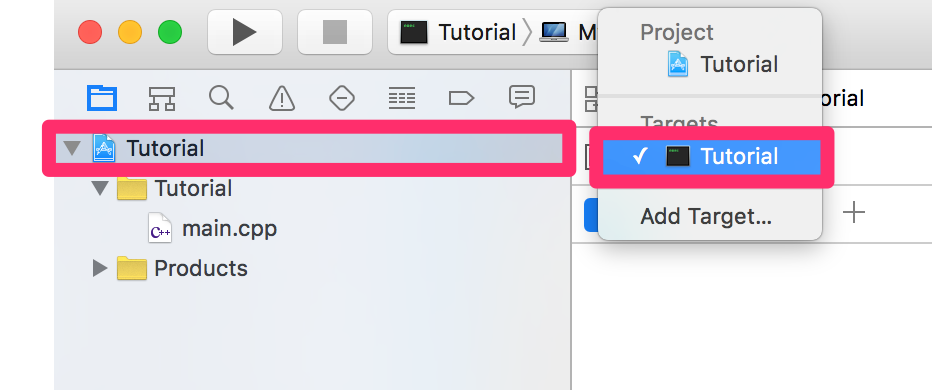
So after you select the project, change the dropdown menu on the right to make sure you’ve selected the target (the only one in your project). It should have the same name as your project, but have a black Terminal-looking icon rather than the blue Application blueprint icon of your project. There, on the Build Settings tab, you will find a lot of options in several categories.
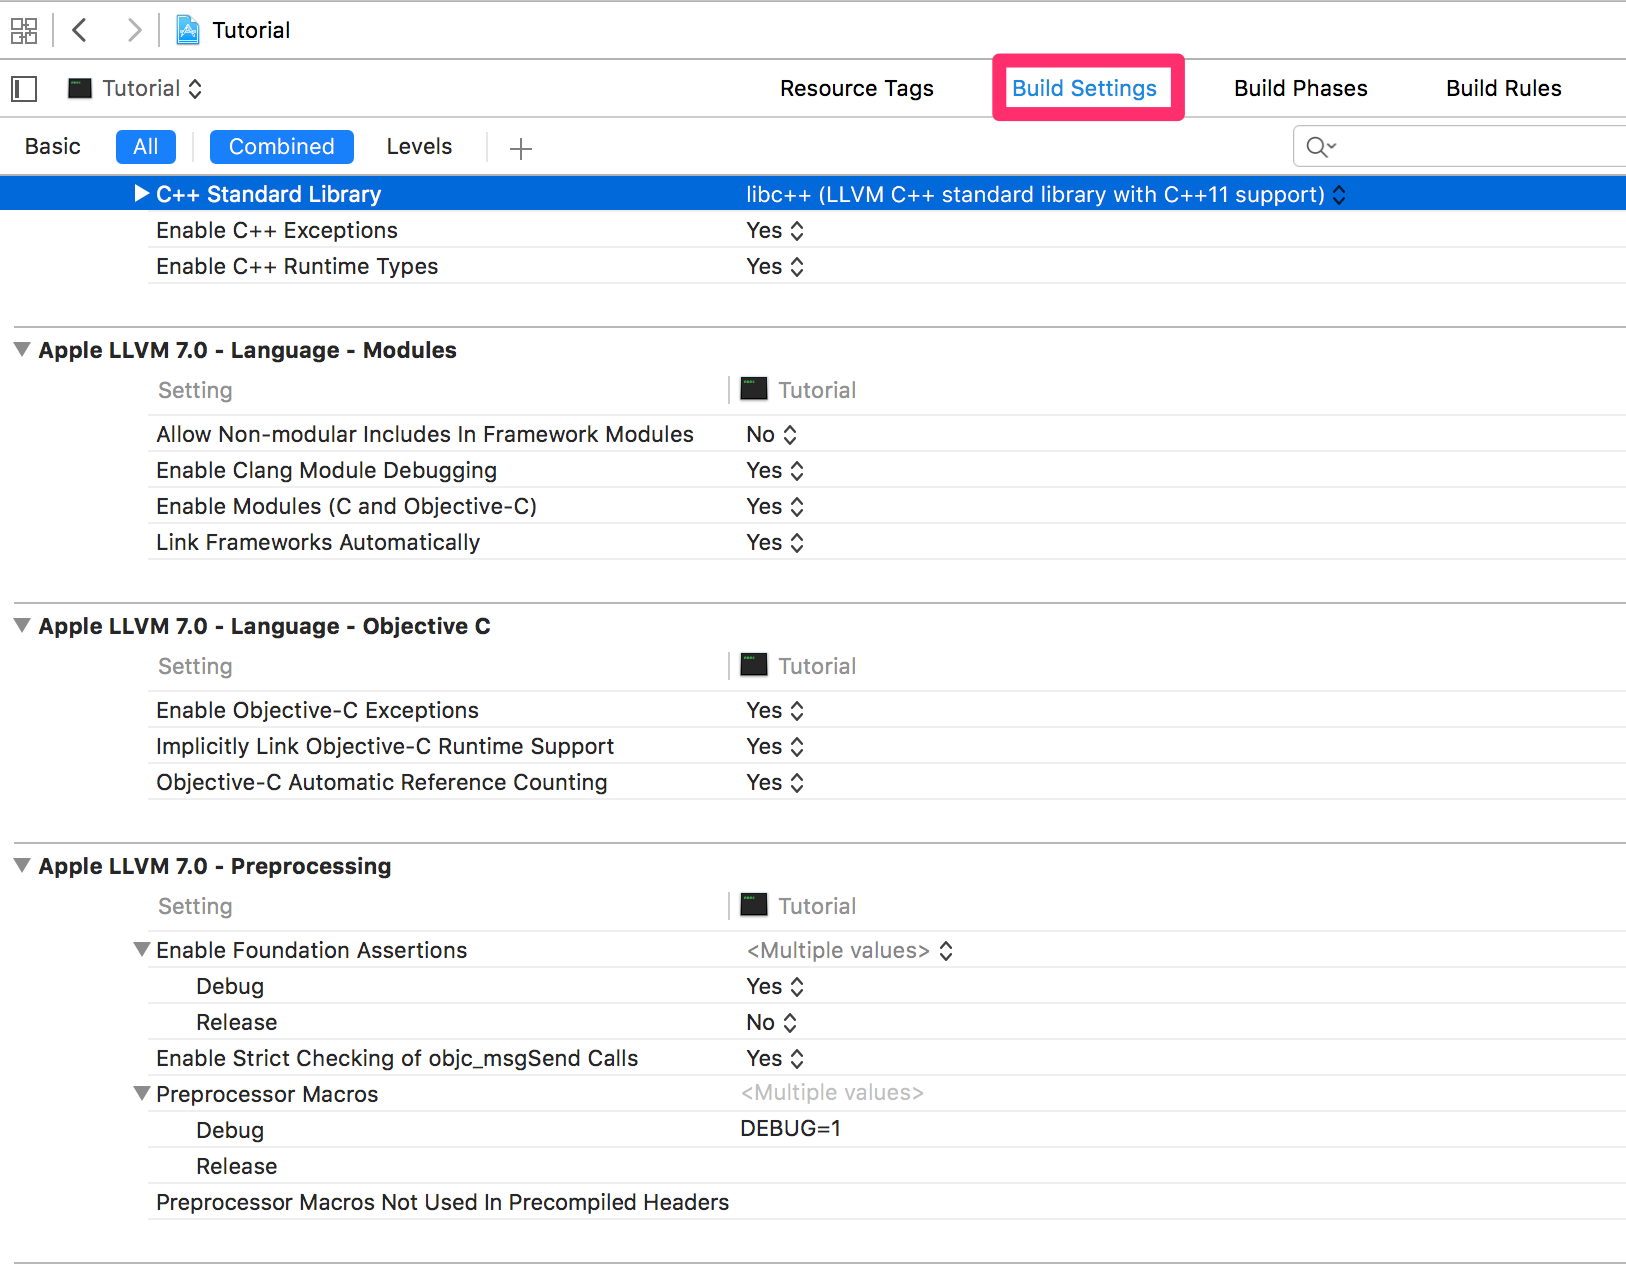
Many of them don’t matter too much, but a few can thoroughly mess with your target, so if you don’t know what something means, I’d generally leave most of the options with their defaults. However, there are a few that deserve a further mention:
- Build Options > Compiler for C/C++/Objective-C: These days the only available option by default is Apple LLVM 7.0. That doesn’t say much, but it basically means using some version of clang Apple forked from LLVM 3.6 (or perhaps 3.7?). In theory, it is possible to modify Xcode to use GCC5, but as Apple moves farther and farther from GCC, I don’t think this is the way to go. Clang is a much better compiler than GCC anyway. It’s faster, gives much more helpful errors, creates better code and its development is not bogged down by an old codebase and general ridiculousness6.
- Search Paths > Framework Search Paths: If you’ve installed some dynamic libraries in the form of Mac Frameworks (rather than Mach-O .dylibs, you might want to add
/Library/Frameworkshere. - Search Paths > Header Search Paths: In most cases, you should add
/usr/local/includehere. - Search Paths > Library Search Paths: In most cases, you should add
/usr/local/libhere. - Apple LLVM 7.0 - Language > C Language Dialect: I like to use the modern standard
c11here, but it’s not very important. - Apple LLVM 7.0 - Language - C++ > C++ Language Dialect: Here you should really choose wisely depending on your code and the packages you’re using. The safest bet is probably
GNU++98, but newer packages will work better (or only) withGNU++11orC++11, or evenGNU++14orC++14. In order to future-proof my code, I am now actively trying to useC++14as much as possible. I personally think it’s nicer to use the newest standardC++14, and avoid the GCC compliantGNU++varieties. - Apple LLVM 7.0 - Language - C++ > C++ Standard Library: I like
libc++. It’s great and made by the LLVM guys. I think it’s also faster than thelibstdc++made by the GCC guys.
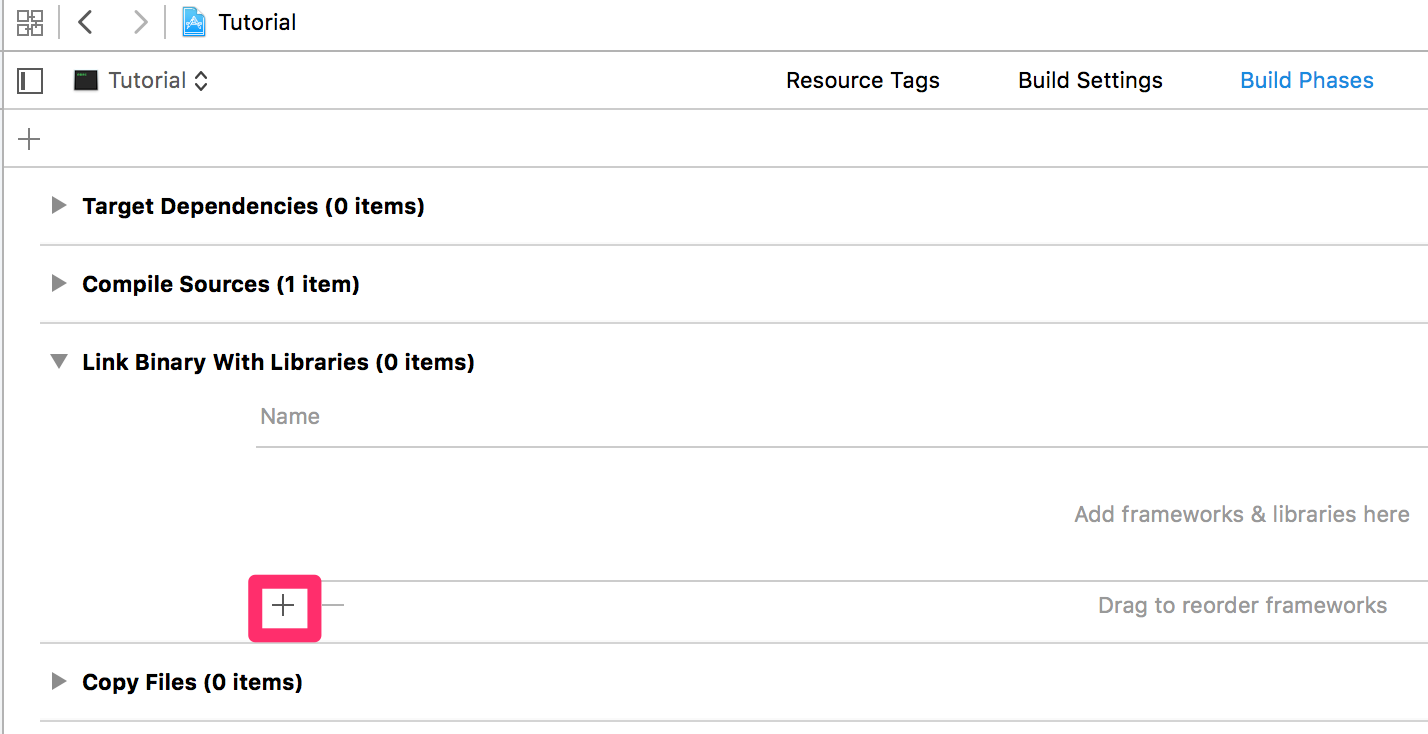
Next, go to the Build Phases tab of the same target. Here, you should add all the dynamic libraries that your code will need to link to. So, open the Link Binary With Libraries collapsible menu and click the + sign below.
You’ll get a cascading sheet containing all the standard Mac OS X Frameworks as contained in /System/Library/Frameworks. You’ll also get all the dynamic libraries contained in /usr/lib. So, in the window you might find some useful ones as used in CGAL, such as OpenGL.framework. However, unless you’ve changed the installation default installation directories of CGAL and its dependencies, they will not be there.
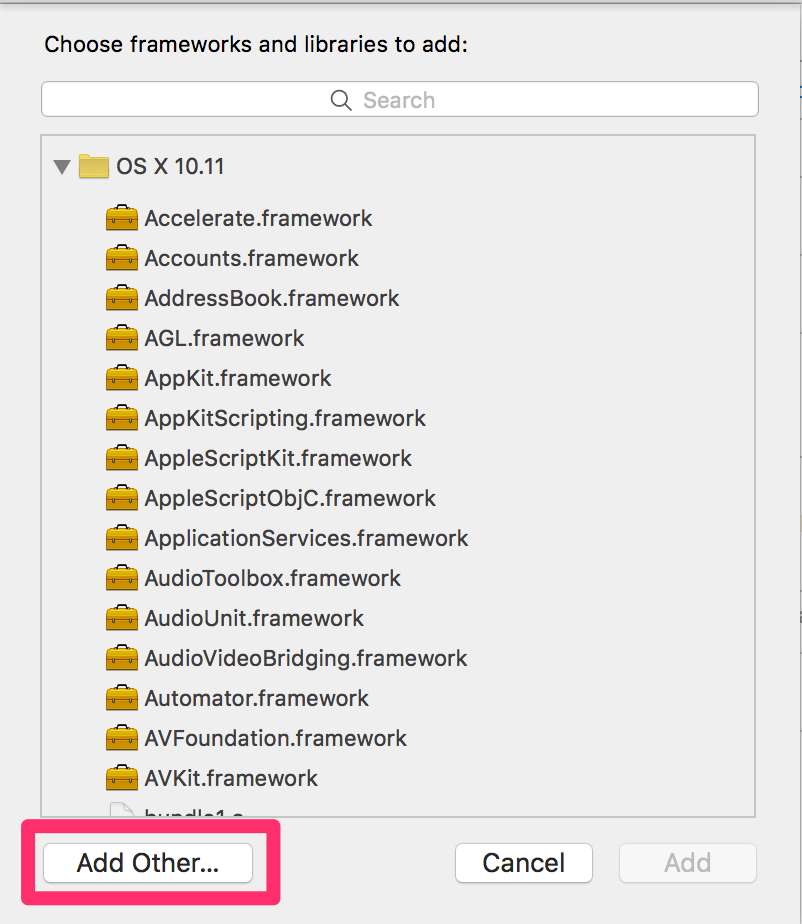
So, instead click on the Add Other… button and you’ll get a standard Finder Open window. Since the libraries you installed are in /usr/local/lib by default and that directory is by default hidden, just type shift+command+g (⇧⌘G) to Go to a folder and type /usr/local/lib. There’s autocomplete.

In there, you should select all the libraries that your CGAL packages need. Select all the ones you need using the ⌘ key. For the basic stuff, these would be:
- libboost_system.dylib or libboost_system-mt.dylib
- libboost_thread.dylib or libboost_thread-mt.dylib
- libCGAL_Core.dylib
- libCGAL.dylib
- libgmp.dylib
- libmpfr.dylib
You might notice that these are actually symlinks to the actual files. Unfortunately, Xcode will make your code point to the actual files instead. This means that when you update your dependencies, your Xcode project will not build anymore. Just check which linked libraries are broken (they will be highlighted in red) and re-add them. If you know a better solution for this, please let me know!
A simple test
With this kind of configuration, you should be able to compile any CGAL code. Just as an example, let’s make a small text that uses Guillaume Damiand’s great Linear Cell Complex package. So, substitute the contents of main.cpp with:
#include <CGAL/Linear_cell_complex.h>

int main(int argc, const char * argv[]) {
  CGAL::Linear_cell_complex<3> lcc3;
  return 0;
}
If you try to build (⌘B), it should succeed (yay!), but there will be plenty of warnings. 20 warnings in my case. This is not necessarily a problem. If you want to ignore them, you should be able to happily start developing your CGAL code. However, I get tired to looking at these warnings and forever wondering if they’re a fault in my code or in CGAL.
Getting rid of the warnings
So, instead, let’s get rid of them by making a few further small changes in the target build settings. Again, click on your project on the top left, select the right target, click on the Build Settings tab and scroll down to the section titled Apple LLVM 7.0 - Warnings - All languages.
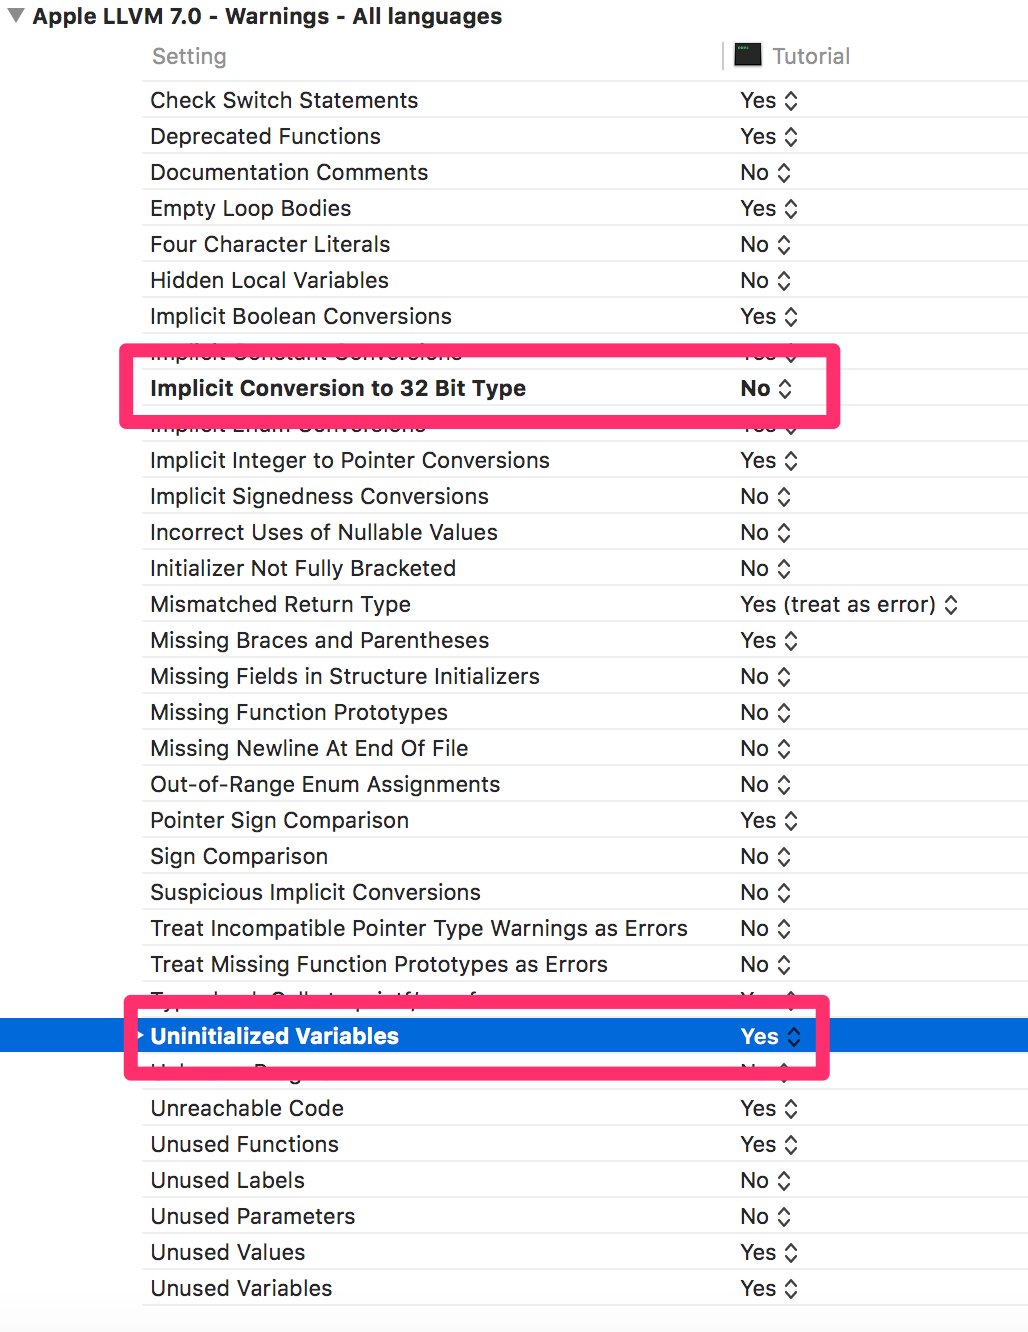
The exact settings you need to change might vary. But these are the two changes that I usually make:
- Implicit Conversion to 32 Bit Type: No
- Uninitialized Variables: Yes
So, if you try to build again the small piece of code we tried before, it should build without warnings as well. Done!

If you find any faults in these instructions or if you have any better ideas, please let me know. I’ll be happy to update the document and make corrections.
-
There are unofficial bindings for Python available (and apparently abandoned?), but they don’t work well. CGAL’s design is based on templated Traits, which generate custom data structures and algorithms at compilation time. This system makes it hard to create generic bindings. ↩
-
There’s a dual licensing system (open source & commercial). On the open source side, many packages are licensed under the LGPL, some under the GPL. ↩
-
And Xcode is not a very good text editor. ↩
-
Unless you are saving your project in an already versioned directory, e.g. a GitHub repository that you already created and cloned for this purpose, I highly recommend you do this. Git is also great. But that’s a topic for a another blog post. ↩
-
Though I haven’t tried it since Xcode 7. See here for a good guide for this. ↩
-
Search for the stories of Objective-C support in GCC. You’ll understand what I mean. ↩